Hello and Welcome to my Blog ~ I love art of all kinds. Two of my favorites are polymer clay and paper art. I have shops on Etsy that feature both of my passions. I also love writing my blog and finding artists that have a passion for their craft and feature them. I hope your day is filled with sunshine, laughter and loads of creativity.


Saturday, March 26, 2011

Masked Faces by Sandy Prenzi

For those of you that are not familiar with my blog, my name is Sandy Prenzi. I am a proud mom of three and a fun-loving Grandmom of three. I grew up in the once small town of Danbury Connecticut and moved several times around the country finally settling in Plano Texas in 1995.

I began creating with polymer clay in May of 2010 and made my first masked face shortly thereafter. My inspiration for them was my trip to Italy. It seemed like every other shop in Venice held these wonderful masks. But, mine are a bit different as they mostly feature the face and headdress rather than the mask itself.


The figure on the left is one of my favorites. I love the mystery that is held behind the mask.

I used Sculpey terra cotta for the face and black glass beads for her eyes. I also used Sculpey for her shroud. I named this one 'Mystery in Purple' which seemed very appropriate for this particular creation.

I use this creation not only for my Avatar but also on my business card.


~*~*~*~*~*~


Meet King Montu, he was the Solar God of Ancient Egypt. His mask was created with Sculpey polymer clay. I added black glass beads for eyes and embellished his with a circular design representing the solar system. headdress


He is approximately 7" tall by 6" wide and comes mounted on a 13" by
7.75" black frame.


~*~*~*~*~*~


This Indian was one of my first creations. I love how his mask and feathers came out I used a blend of purples to make the feathers and mica powder on the stamped designed mask to give it the effect that I wanted. Copper mica powder was the key embellishment for the face and I found I had these fabulous colored glass beads to use for the eyes.

As it turned out, I was very pleased with his appearance. He measures approximately 5" in length and 4" wide.


~*~*~*~*~*~


Here is my 'Biker Babe' I loved creating this one. I wanted her headdress and mask to look like leather and I think I succeeded.

Can't you just picture this?

She rode her Harley to the Masquerade Ball. Everyone watched as she sauntered into the ballroom sparkling with bronze highlights from the cascading light of the chandelier.

She was created with polymer clay and is approximately 6" wide
by 7" tall and is mounted on a 7" by 13" black frame.


~*~*~*~*~*~

This fella can't wait to be the life of the party. His marbled face hardly cracks a smile, but he makes everyone else laugh. He was created with Sculpey polymer clay, glass beads and a dab of humor. He is approximately 6" tall by 4" wide and comes in a black shadow box.

This piece was such a happenstance. I had some clay that was left over from several projects and they were all fairly light colors so I began melding them together and found that it looked a lot like Marble. UMMM, I thought, wouldn't this make an interesting face. I decided to use red for the hair and mask so the marble look would pop out even more. The glass beads that I use on most of my faces come from Michaels. They are flat in shape and measure 1/2 inch round. Perfect for the look I want.


~*~*~*~*~*~


Here is another one of my favorites. My thought for her headdress was to use the orange and rust colors to make it appear very silky. As I created her I thought about her riding through the white desert sands on her black steed. Her silk robe flowing behind her as she gallops toward her destination.

Isn't it funny the things you think about as you create. I just can't picture her anywhere else.

She is approximately 5" wide by 8" tall and has been mounted on a 8.75" by 10.75" black frame.

~*~*~*~*~*~


I think I was watching a marathon of Harry Potter movies when I came up with this one.

The name of this creations is 'Lizard Wizard'. Notice the Lizard emblem on this Wizard's headdress. In Roman mythology the lizard was thought to sleep throughout the winter and thus came to symbolize death and resurrection.

This creation is approximately 9" tall by 4.5" wide and comes mounted on a 13" by 7.75" black frame.

She was also created out of Sculpey and embellished with a stamped design. I was extremely happy with how it turned out. I added the little crystal star on her check because I thought she should have a beauty mark.


~*~*~*~*~*~


This was another of my first sculptures. I named her Robyn Hood. She lives in the enchanted forest and has a little raven haired fairy named Trink that is her best friend.

She was created out of Sculpey polymer clay and embellished with a rubber stamped design. Trink plucked the feathers for Robyn's cap from a hawk that was sleeping high in a treetop at the edge of the forest and boy, was that hawk ever mad. It chased poor little Trink for miles before he gave up and let her go on her merry way.


~*~*~*~*~*~


I decided to travel to the Far East in my thoughts and create this piece. I remember in 'The King and I', that the maidens wore headdresses similar to this one.

She was created with Sculpey polymer clay and embellished with rubber stamps and mica powders.

This creation is approximately 5" tall by 5.5" wide and comes mounted on a 8" tall by 7.5" wide black


~*~*~*~*~*~


The Ocean was on my mind the day I created this one. I think if I had made the body to go with her, she would have been a mermaid.

She was created with Sculpey polymer clay. I love how the headdress glistens, just like the waves do when the sun is hitting them. I spread white glitter glue on the headdress to make this effect.

She is approximately 5" wide by 7" in length and has been mounted on a 9" wide by 11" black on black frame.

~*~*~*~*~*~

These are just a few of my masked faces. You can see more at: Sandy's Creations by mstp on Etsy

Saturday, March 19, 2011

Beautiful Images using the Mica-Shift Technique

It is my pleasure to introduce you to 'Polymer Clay for a Cause'.


About the Artist in her own wordsI started Polymer Clay for a Cause in honor of my daughter, Cortney.


Cortney had an incredibly artistic mind, but due to her Muscular Dystrophy we were not able to find a medium that she could do. So in turn during her years of living at Childrens Hospital she would tell me GREAT stories and I would try to bring them to life thru polymer clay. Clay became both of our worlds, just in different ways. Cortney left this world at the age of 14 to go dance for the first time, but I try to continue her spirit thru clay and charities (Cortney would grow her hair out, just to donate it to locks of love - which for a girl in a wheelchair is rough to do - that was the kind of soul she was). I will list photos of her in the store, if you wish to see her!
About the store.....
This is a non-profit shop that takes art work from any polymer clay artist that wishes to contribute. About every four months the PCAGOE (Polymer Clay Artist Guild on Etsy) will vote on a children's charity which ALL of the sales from this shop go to that orginization.

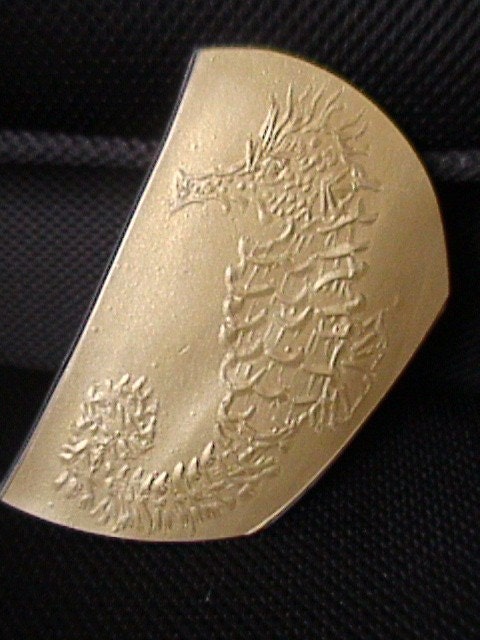
Seahorse Mica Shift

Seahorse Mica Shift
zoom
Seahorse Mica Shift Seahorse Mica Shift Seahorse Mica Shift Seahorse Mica Shift
The artist describes this item and her technique:


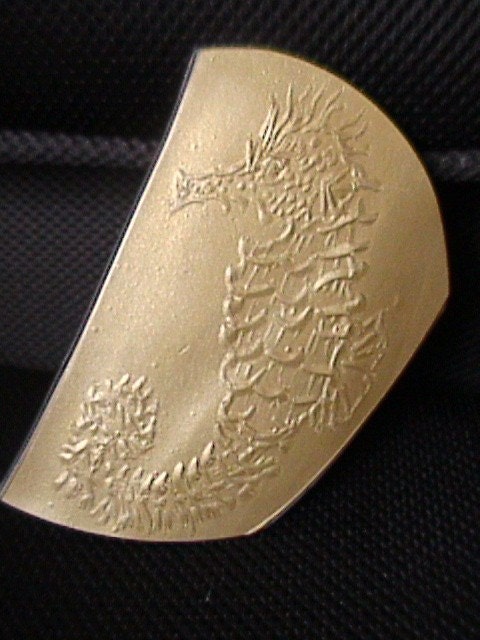
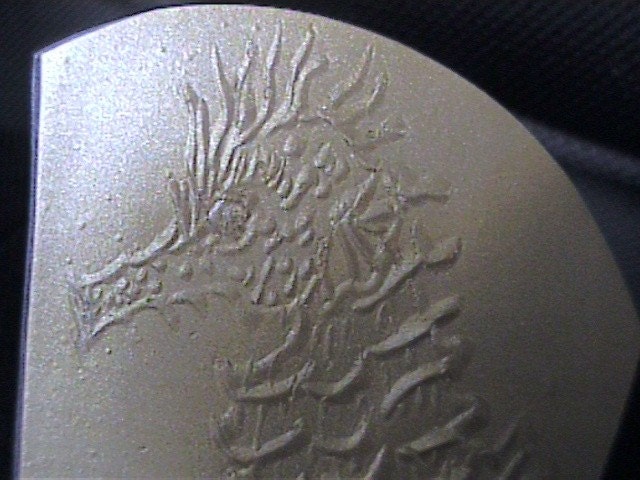
Beautiful mica-shift 'Seahorse' on gold Premo polymer clay! Hand-carved OOAK mica-shift technique. This piece is completely smooth with wonderful depth. Can be displayed on a very small easel or matted and framed. You could also use E6000 glue to place a hanger on the back to decorate a small area of wall :) Measures approx. 3" x 4" inches (1/16th inch thick) signed, titled and dated on the back.
The technique behind the art:


Mica-shift is accomplished by first conditioning the right kind of clay (I use Gold, Silver or Pearl Premo) and smoothing it out so all the 'mica crystals' are going in the same direction and then either stamping or hand-carving a design on the surface. These animal portraits are very difficult! You have to work very slowly and carefully with each movement of the tool. I use a small, wire triangular loop to remove thin strips and tiny sections of clay and then put the finished carving through the pasta machine a couple times, first one direction and then the opposite to stretch the design and smooth the surface. They are then baked, wet-sanded and waxed to a silky smoothness. I absolutely love the look of this style of clay work, the depth you can achieve and the various shadings are just so cool!
~*~*~*~*~*~
Sally
Frit Happens Forum

This beautiful bangle was created using mica shift technique by Sally from the Frit Happens forum. I think she did a beautiful job.
Polymer clay Bangle

on: July 17, 2009, 01:47:50 PM »


The Artist in her own words
This is a bangle I made following a step-by-step in one of Donna Kato's books. It's a bangle made using the mica shift technique. This technique gives the look of a raised pattern without it actually being raised.
~*~*~*~*~*~*~
KRISTI FOSS CREATIONS

The Artist in her own words

Mica Shift - what an incredible technique! I started playing with it one day, and just can't seem to stop. I especially like the way Skinner blends look with the mica sift technique applied. Of course, once you have these lovely sheets, you need to do something with them...Then I found some little curved spacers at Beaded Impressions, and decided to see how they'd look as embellishments. Here's a couple of pendant/earring sets ~ I especially like the fact that the little discs move and twirl.

Just so you can see the discs and the mica pattern, here's a close up:

I also had to incorporate PMC in a piece with a little movement. I really like the ability to have the texture that is imbedded in the PMC echoed in the smooth mica shift of the polymer. What a great combination of media!


If you're not familiar with the mica shift technique, there is a great tutorial on Polymer Clay Central. The tutorial is done by Kellie Robinson, and is very clear with excellent photos.
Here's the URL:
http://www.polymerclaycentral.com/ms_texture.html


Give it a try! Bet you can't do just one!


You can see more of Kristie's work at: http://www.kristiefoss.blogspot.com/

Sunday, March 13, 2011

Jewelry Artists Maria Psaltis, and Debbie Crothers, plus Polymer Clay on Canvas

I am proud to feature two wonderful polymer clay
Jewelry Artisans from Australia

Maria Psaltis


Maria Psaltis is from Sidney and is a mother,wife and polymer clay artist. She also works with young people at risk.


3350219914_1f14abca76_m
Maria creates some of her jewelry with varied materials, for example, adding polymer clay mokume gane beads to the leather rose below to create this exquisite necklace.

You can visit her website at:
http://www.oneandonlyuniquedesigns.com/


Maria was featured on Polymer Clay Daily in July of 2010.


In Maria's own words:

What a surprise to be featured on Polymer Clay daily..I read through the post everyday and have often had my jaw hit the ground with some of the most amazing work from artists around the world.It is truly so exciting for me.

Maria has a shop on Etsy and you can view her beautiful jewelry at:
http://www.etsy.com/shop/mariapsaltis

~*~*~*~*~*~

Debbie Crothers
Geraldton Australia

I am a mum to 3 great kids. I also have a wonderful husband (15 years married) who is very supportive and encouraging. I live in Geraldton which is on the west coast of Australia right on the beach. It's a great place to live and raise children. I mainly work with clay but I do also teach beaded jewellery making at our local community art gallery. I've been working with clay on and off for a few years but more seriously in the last couple. I find it a fantastic medium to work with and am totally enjoying exploring the possibilities of clay.

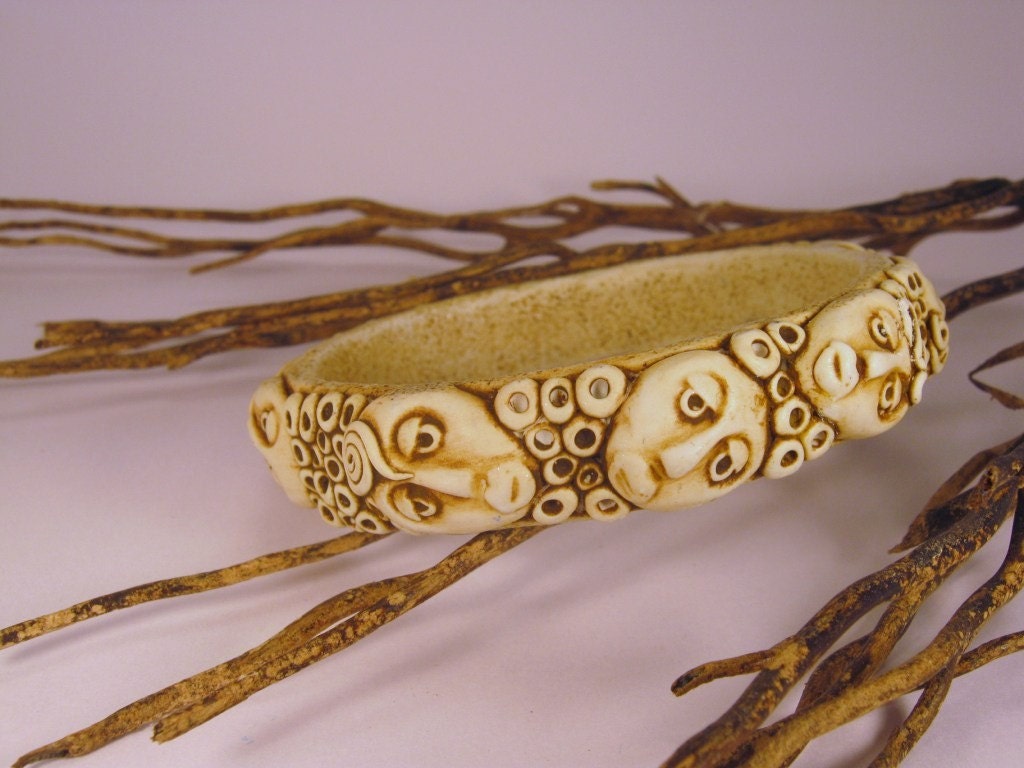
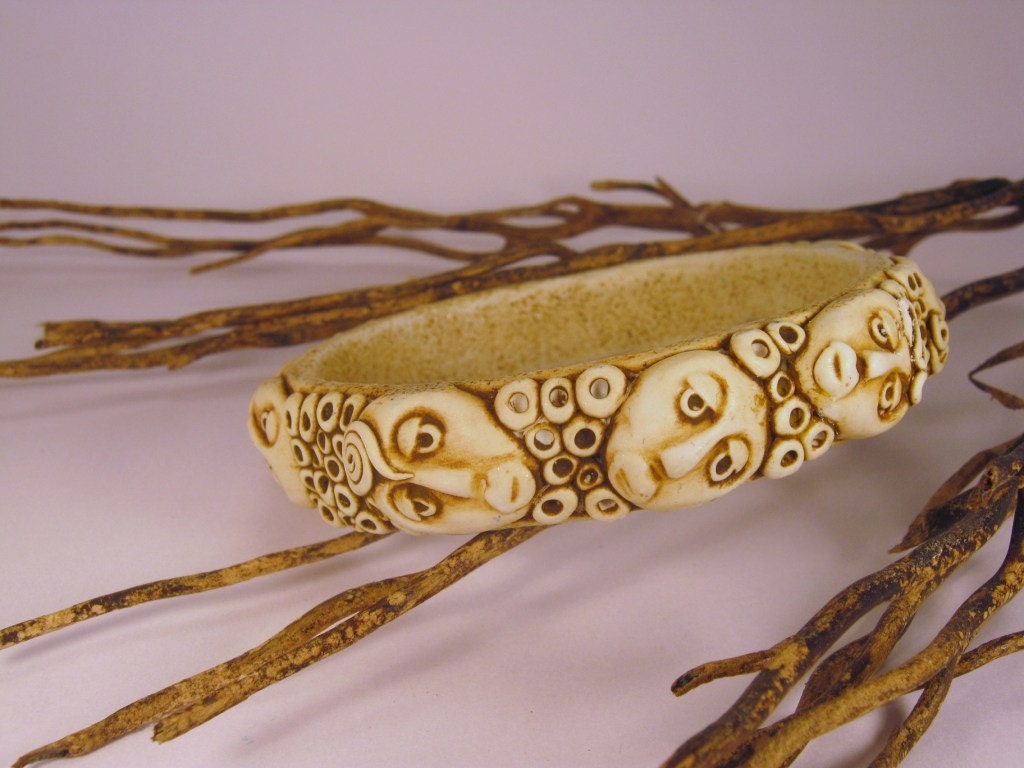
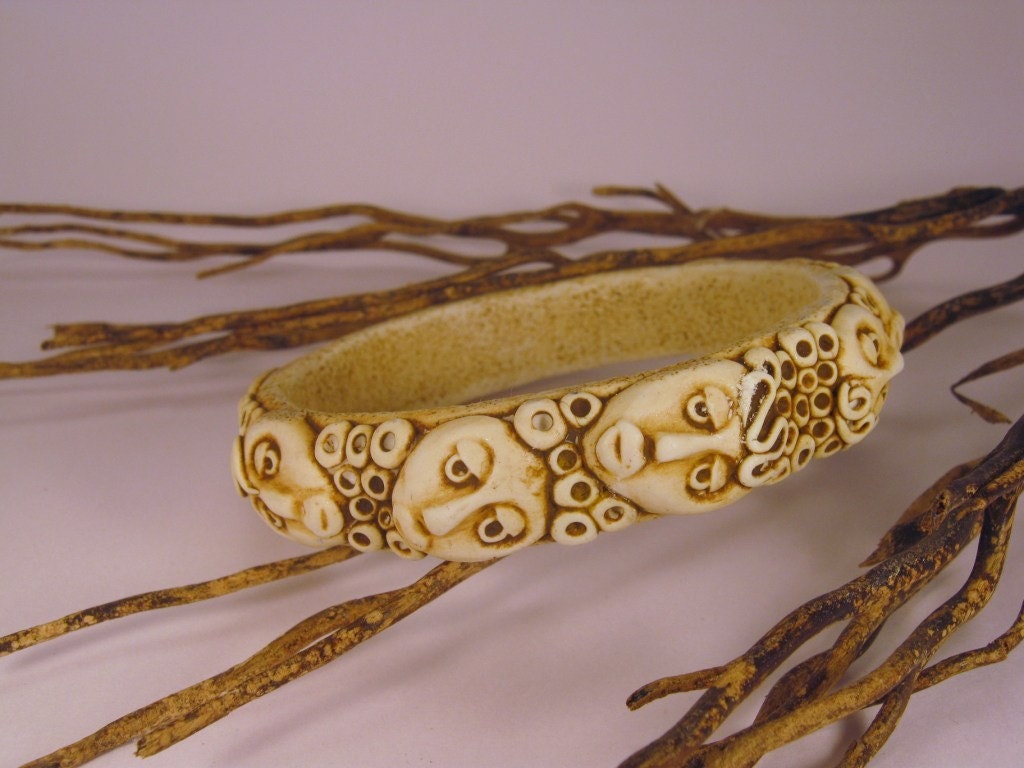
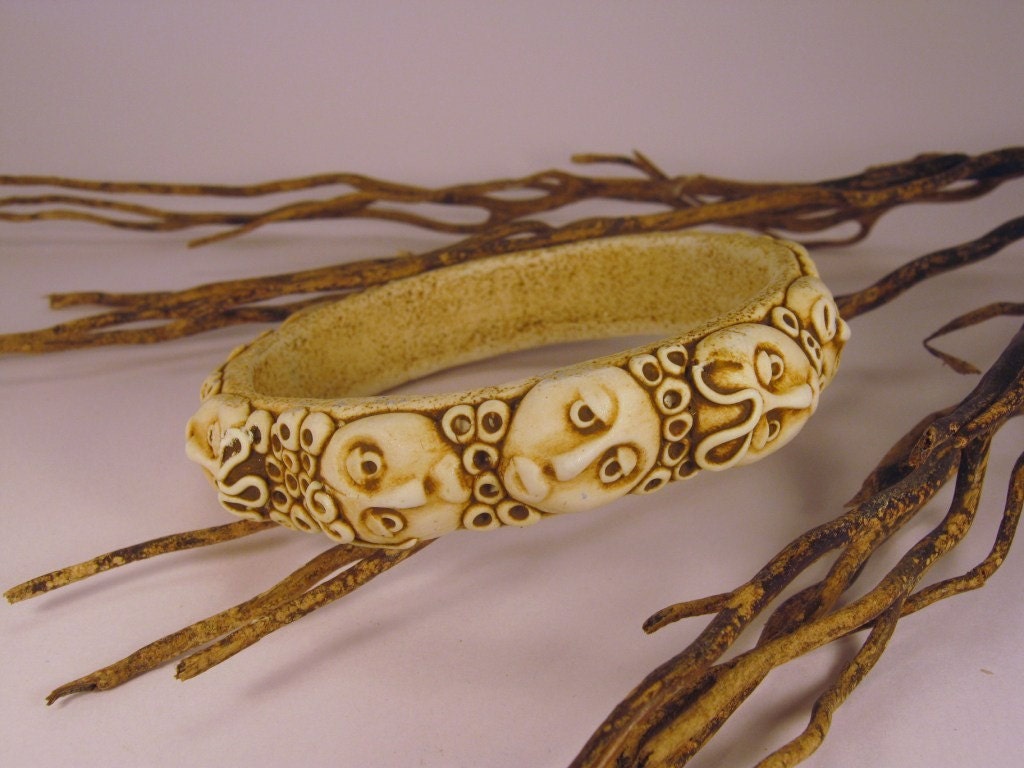
Antiqued African Style Bangle Handmade from Polymer Clay


Antiqued African Style Bangle Handmade from Polymer Clay
zoom
Antiqued African Style Bangle Handmade from Polymer Clay Antiqued African Style Bangle Handmade from Polymer Clay Antiqued African Style Bangle Handmade from Polymer Clay Antiqued African Style Bangle Handmade from Polymer Clay Antiqued African Style Bangle Handmade from Polymer Clay

Quirky and unique is this gorgeous bangle. I've used an African face mold to create the pieces that make up the basis of this bangle and then surrounded them with textured pieces of polymer clay. The whole bangle has been brushed over with oil paint and then rubbed back to create a rustic, antique finish.

You can see more of Debbie's beautiful creations at:

~*~*~*~*~

Polymer Clay on Canvas

Create a miniature art canvas with polymer clay shapes and accents such as beads and buttons. Use cookie cutters to help you create shapes with the clay and household items such a comb to create texture. This project comes to us compliments of Heidi Borchers for Inspired at Home.

Polymer Clay Heart Canvas

Materials:

  • Polymer clay
  • Canvas 4” x 4”
  • Polymer clay
  • Pasta machine (dedicated to clay use only) or a rolling pin on freezer paper
  • Rubber stamps or texture sheets – assorted designs – or household utensils
  • Baby powder (or cornstarch)
  • Knife or clay type blade for cutting clay
  • Cookie cutter for heart shape
  • Non stick baking sheet (dedicated to clay use only)
  • Acrylic paint - black
  • Brush – ½” flat
  • Rub ‘n Buff Metallic Paste - gold & silver
  • Assorted beads, charms, and glass mirror pieces to embed into clay
  • Aleene’s® Platinum Bond™ 7800 All-Purpose Adhesive
  • Oven


Instructions:

  1. Soften (condition) clay by running through pasta machine several times (or roll out with rolling pin). For final thickness you will need about 1/8’ thick.
  2. Place onto freezer paper or a non stick baking sheet while creating design. Determine and cut size, shape and placement in order for clay piece to fit on canvas.
  3. Prepare rubber stamps by sprinkling with baby powder and shake off excess. Carefully push prepared rubber stamp into clay. For heart shape, use a cookie cutter and cut out clay. Overlap pieces and press beads and charms or mirrors into clay.
  4. Roll out several long snake type pieces and flatten out. Imprint with lines using knife. Press around stamped heart, beads, charms and mirror pieces.
  5. Place clay piece in oven and bake according to package directions.
  6. When clay piece is cool, glue onto canvas. Let glue dry.
  7. Paint entire canvas and baked clay piece with black acrylic paint. Let dry.
  8. Apply Rub n Buff according to package directions. Let dry.
Heidi's Designer Tips: If you don’t have rubber stamps, you can use household items. Look for intriguing patterns in decorative buttons and kitchen utensils. For the lined pattern on the heart, I used a comb. Also, it’s easy to change up the design with different cookie cutter shapes!

Tuesday, March 8, 2011

Cold Porcelain, Mica Powders, Resins and Nail Art


On my previous post, I had a recipe for cold porcelain. Many of you wanted to see some jewelry made from this recipe. I am happy to present this beautiful piece from Doughroses.

http://www.flickr.com/photos/32176572@N00/


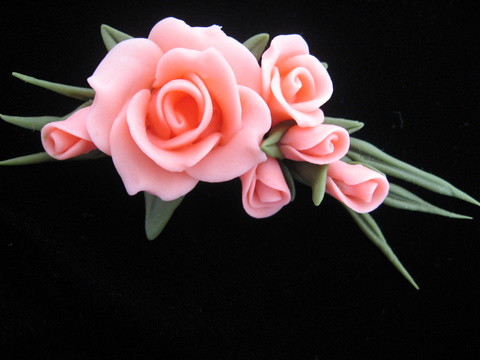
Coral Rose Cluster Pin

by: Doughroses

photo

This pin measures about 3" long and is made with cold porcelain.

See more cold porcelain jewelry at:
http://www.flickr.com/groups/1156910@N20/

~*~*~*~*~*~

Pendant and Earring Set

By: Rose Petals


You can visit Rose Petals shop on Artfire
http://www.artfire.com/modules.php?name=Shop&seller_id=16446&op=new&body=1

~*~*~*~*~*~
Mica Powders

I love Mica powders. They give a beautiful finish to your jewelry and or sculptured pieces.  I used green and pink 'Perfect Pearls' on the roses leaves, door and surround for this creation.

Mica powders are made from tiny particles of mica, mica powders provide a pearly, metallic look without metal. They are non-toxic and color fast, with a neutral pH, and though you wouldn't want to purposefully inhale them, they are less dangerous than metal pulvers. Available in a wide array of colors, mica powders have numerous uses for polymer clay artists as well as those who work in other media. They can be applied dry to the surface of raw clay, mixed into raw clay, painted onto raw or cured clay (though most will have to be mixed into a moist medium, first), and so on. Most surface applications will need a coat of polymer clay-friendly finish to prevent the powders from gradually rubbing off.

You can mix mica powder into clay to strengthen the effect of metallic clays or make pearly colored clay If you mix it into translucent clay, they tint it to lovely shimmering colors. Use it lavishly on liquid clay or varnishes to turn cured clay into glowingly glazed pieces.

Examples

Pearl-Ex, from Jacquard--
Available in 40 colors, including pearlescents, interference colors, and duo-colors. Comes in .5-oz., .75-oz, 4-oz., and 16-oz. bottles, or in sample kits, usually with 3-gram bottles of twelve different colors.
http://www.jacquardproducts.com/products/pearlex


Perfect Pearls, from Ranger--
Available in six different 4-color sets, which includes one set of interference colors. Unlike other mica powders, Perfect Pearls has a built-in resin binder. This helps them to bond to clay during curing.
http://www.rangerink.com/product_perfectpearls.html

PCE Powders, from PolymerClayExpress.com--
Available on-line in 10-gram jars from www.polymerclayexpress.com. Comes in six different metal colors, in varying coarsenesses.
You can also purchase many of these powders at your local craft store.

Other Fun Ingredients

There are so many things you can mix into polymer clay, glitter, dried flowers, leaves, embossing powder and many cooking ingredients just to name a few.


~*~*~*~*~*~
Resins

Tonja from Tonja's Treasures wrote a post on her blog about resins that is full of wonderful information. You will be delighted with all her research.

~*~*~*~*~*~
Polymer Clay Nail Art
Apply these exciting pre-designed images to your nails in minutes. Dozens of designs to choose from, they last from 10 to 14 days and can be changed as often as you like. Nail techs love our PolyNail nail art since the designs are easy to apply and appear to float when embedded in acrylic nail gel, but you can also create professional nail designs of your own at home in minutes!
Use the designs by themselves, or along with other designs for your own unique look!
PolyNail nail art is both sturdy and extremely flexible, which makes it last longer and a breeze to apply. Use our designs individually or mixed together to create your own unique styles. Available pre-sliced or in cane form, our PolyNail nail art designs can also be custom ordered to your specifications.

Easy Steps to Apply PolyNail Nail Art

Use nail glue to adhere the PolyNail nail art slices to the fingernail in the desired location, making sure to seal all the edges with glue. Just start with a small drop of glue and spread it around with the tip of the glue bottle - too much glue can make it difficult to place your slices.
Once the glue is dry you may sand the top of the slices lightly with a nail file if necessary to even the edges or remove any excess glue. Since the design goes all the way through the slice you won't mar the design if you gently file the top.
Apply a clear coat or a layer of acrylic or gel over the slices, allow to dry, and you're ready to go!
Remove the nail art by soaking your nails in acetone nail polish remover until the glue dissolves, then gently peel away any remaining designs.

~*~*~*~*~*~
Arte de Vanessa Colon

Mas de polymer clay


You will find loads of wonderful pictures of nail art on the following link:

http://www.google.com/images?q=polymer+clay+nail+pictures&oe=utf-8&rls=org.mozilla:en-US:official&client=firefox-a&um=1&ie=UTF-8&source=univ&sa=X&ei=jHh1TfWuI5Oz0QGQsajoBg&ved=0CDEQsAQ&biw=1264&bih=835ou

Wednesday, March 2, 2011

Three of Australia's Finest Polymer Clay Artists

I am proud to present three extremely talented Australian polymer clay artists.


GREER

Greer has been a member of Aussiepolyclay since June of 2008 and does amazing work. With this piece, she used a wash glaze polymer clay. Layers of liquid clay tinted with oil paints, applied in thin layers and fired separately.


~*~*~*~*~*~
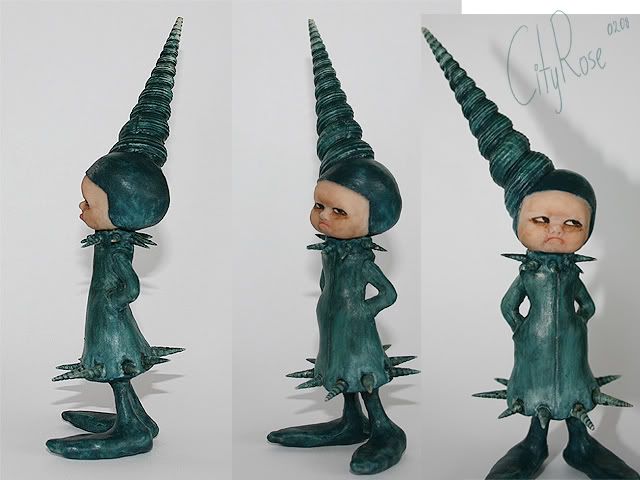
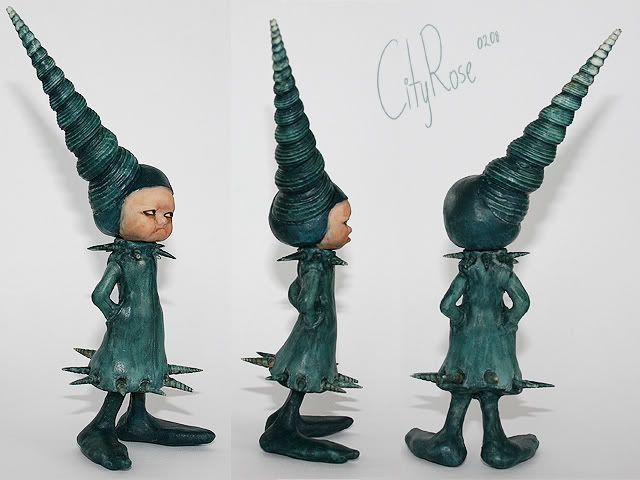
City Rose

City Rose has created this adorable Spikeboy. He's a sculpture 'sketch'........ an idea that was quickly roughed out start to finish while watching a movie.


From the Artist

I have an overflowing supply of shells of different shapes and sizes. I was collecting them for when I intended to do mermaid sculptures, but I've since decided that I didn't want to walk the beaten track. So I grabbed a couple of those spikey cone shells and this is the idea that formed! He's my little SpikeBoy, created using a rough wire and Magic Sculpt armature, Prosculpt, Genesis Heat Set Paints and TLS (to seal). And shells of course, which have been attached to the armature with epoxy. The paint job on the clothing is intentionally 'painterly-a-la-tim-burton'.

~*~*~*~*~*~
Sabine Spiesser

"Mokume Gane" Featured on Voila

Sabine is a fabulous jewelry artist and was featured in this polymer clay magazine.

photo

www.voila.eu.com/


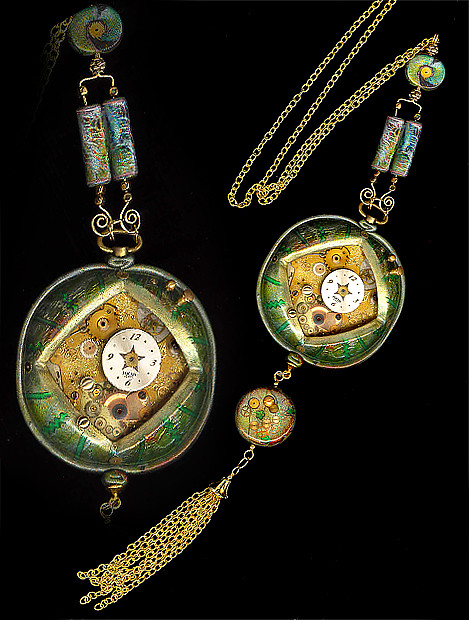
Her delightful steampunkery


She found this difficult to photograph with all the shiny surfaces, so she tried scanning. The depth of field on these pieces is amazing.

From the Artist

I took apart an old alarm clock, added some clock parts and just followed my muse. I learned so much from this experiment - definitely have to explore creating three dimensional pieces more.

You can see more of Sabine's work at:
www.papagodesign.com
http://www.flickr.com/photos/papagodesign/


~*~*~*~*~*~

Kris from Aussiepolyclay found this recipe for Cold Porcelain.


- 1-cup cornstarch
- 3/4 cup Elmer's Glue (white) (PVA)
- 1/2 cup water
- 1 teaspoon Ponds Cold Cream (must use this brand for this recipe to work)
- 1 teaspoon baby oil

**(once you start this, don't stop, especially when heating, don't stop stirring)**

Put cornstarch, glue, water, baby oil and ponds into non-stick pan and mix well. (I use a whisk, but you can use a large spoon too)

Turn stove on low to medium heat and keep mixing mixture continually until it balls up like bread dough. Remove from heat and as soon as you can touch it, begin to knead it. Put a small amount of Pond's on your hands to keep mixture from sticking to your hands.

The porcelain may be amber in color at this time, but as you knead it, if you are doing it right, it will start to turn a bright white and have no lumps and be extremely smooth.

**It is important to wrap this porcelain in Saran Wrap and then in 2-3 Zip-lock Bags, as no air can be allowed to get to it.

This is an "Air Dry" type of porcelain, so you do not have to bake it. (It takes up to 3 days to completely dry, depending on the thickness of your piece. It dries as hard as a rock believe me, and humidity and heat do not cause any problems with the finished work).

***DO NOT PUT IT IN THE REFRIGERATOR EVER***

This will have a transparent look to it when air-dried. You can add color to it with oil colors and mix well.

Click on the following link to see more COLD PORCELAIN RECIPES:


Thank you for visiting my blog and have a wonderful, clayful day!